 |
 |
 |
 |
 |
 |
 |
 |
 |
 |
 |
 |
 |
 |
 |
 |
 |
 |
 |
Historiek
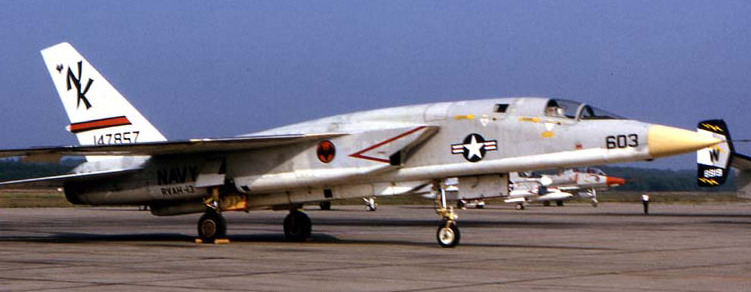
De North American RA-5C Vigilante is het langste vliegtuig dat ooit van een vliegdekschip opereerde.
De A-3 Skywarrior was een klein beetje korter en zwaarder, en de spanwijdte was een ietsje groter, maar de Vigilante was met zijn Mach 2.5 veel sneller dan de subsonische Skywarrior.
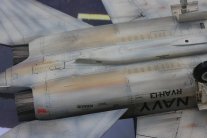
Het vliegtuig was in een eerste gedaante, de A-5A, ontwikkeld als zware bommenwerper, met een brandstoftank en een kernbom in een buisvormig compartiment tussen de twee motoren. Beide werden naar achter uitgeworpen tijdens een steile klim boven het doel, waarbij de brandstoftank als stabilisator diende voor de bom. De A-5A voltooide de halve looping, rolde horizontaal en vloog op volle snelheid weg van het afwerppunt om op tijd weg te zijn van de kernontploffing. Dat afwerpen bleek toch nogal problematisch, en inmiddels waren er kernduikboten met Polarisraketten in dienst gekomen, zodat de A-5A eigenlijk achterhaald was nog voor hij goed en wel op punt stond. Er werden slechts 57 A-5A en 18 A-5B gebouwd. De uiteindelijke versie was de RA-5C, een verkenningsvliegtuig, waarvan er 79 zijn gebouwd. Van de A-5A en B zijn er uiteindelijk nog 45 exemplaren geconverteerd naar de RA-5C versie. Tijdens de Vietnam oorlog zijn er 28 van deze toestellen door vijandelijke luchtafweer verloren gegaan. Dat was ook niet verwonderlijk: na een luchtaanval werd er steeds een verkenningstoestel over het doelwit gestuurd om aan de hand van foto's te kunnen inschatten welke schade de bommen hadden aangericht. Die verkenningsvlucht kwam steevast 10 minuten na de bommenwerpers: lang genoeg zodat de rook was weggewaaid en het stof was gaan liggen. En vooral: tijd voor de luchtafweer om het luchtdoelgeschut te laden en bemannen... De RA-5C had een lange gondel (de kano genaamd) onder de romp, met daarin diverse fotocamera's en zijwaarts kijkende radar. Onder de neus zat een televisiecamera die bij weinig licht kon gebruikt worden. In de ex-bommenruimte tussen de motoren zaten nu allerhande sensoren en ECM-stoorzenders. Onder de vleugels kon er heel sterke flitsapparatuur in twee gondels worden meegenomen voor nachtfotografgie. Die werden echter zo goed als nooit gedragen, omdat de flitsen de positie van het vliegtuig aan de luchtafweer verrieden. Nog wat wetenswaardigheden: de A-5 was het eerste vliegtuig met een fly-by-wire besturingssysteem en een HUD. Het had ook een digitale computer aan boord voor navigatie en bommenrichten. |
History
The North American RA-5C Vigilante is the longest aircraft that ever operated from an aircraft carrier. The A-3 Skywarrior was a little shorter and heavier, and its wingspan was a little larger, but the Vigilante, at Mach 2.5, was much faster than the subsonic Skywarrior.
In its first guise, the A-5A, had been developed as a heavy bomber, with a fuel tank and a nuclear bomb in a tubular compartment between the two engines. Both were ejected aft during a steep climb above the target, with the fuel tank serving as a stabilizer for the bomb. The A-5A completed the half looping, rolled horizontally and flew away from the ejection point at full speed to get away from the nuclear blast in time. That ejection proved to be rather problematic, and by then nuclear submarines with Polaris missiles had entered service, so the A-5A was in fact obsolete before all the kinks were worked out. Only 57 A-5A and 18 A-5B were built. The final version was the RA-5C, a reconnaissance aircraft, of which 79 were built. 45 A-5A and B were eventually converted to the RA-5C version. During the Vietnam War, 28 of these aircraft were lost to enemy anti-aircraft fire. This was not surprising: always after an airstrike, a reconnaissance aircraft was sent to photograph the target in order to estimate what damage the bombs had done. That reconnaissance flight invariably came 10 minutes after the bombers had left: long enough so that the smoke had blown away and the dust had settled. And above all: time for the anti-aircraft guns to load and man the anti-aircraft guns.... The RA-5C had a long nacelle (called the canoe) under the fuselage, containing several photo cameras and side-viewing radar. Under the nose was a television camera that could be used in low light conditions. The former bomb bay between the engines now contained all sorts of sensors and ECM jammers. Under the wings, very powerful flash equipment for night photography could be carried in two pods. However, these were almost never carried, as the flashes gave the position of the aircraft away to the anti-aircraft gunners. Some more facts: the A-5 was the first aircraft with a HUD and a fly-by-wire control system. It also had an on board digital computer for navigation and bomb aiming. |
Bouwverslag
De Vigilante is een model dat al heel lang op mijn (en op dat van mede-modelbouwers hun) verlanglijstje staat.
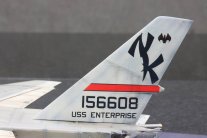
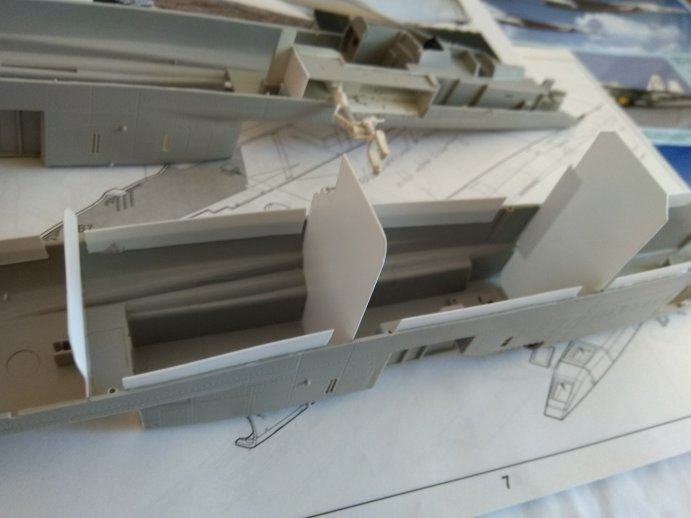
Trumpeter bracht de langverwachte kit uit in de vroege jaren 2000. Hoewel de kit vrij verzorgd is, valt er toch heel wat op aan te merken. Eerst en vooral is het model een mix van "vroege" en "late" Vigilantes. De staartkegel is niet correct voor een late versie, en dat is niet eenvoudig te corrigeren - wat ik dan ook niet deed. Het profiel van het richtingsroer is eveneens fout, maar dat was makkelijk bij te werken met een liniaal, een scherp mes en wat schuurpapier. De straalpijpen waren voor een vroege Vigi, terwijl het model en de decals meer een late Vigi voorstellen. Dat probleem was al gauw opgelost door de firma Aires een beetje rijker te maken. Idem voor de cockpit, die niet erg overeenkomt met de late RA-5C. Dus nog even mijn portefeuille getrokken voor een stel Quickboost schietstoelen, en een Eduard detail set. De bouw op zich kende ook een paar uitdagingen. De romp is vrij lang, en bestaat uiit een linker- en rechterhelft. Dat zorgt voor een erg lange en fragiele naad op de rug en buik. De naad onderaan zit verborgen onder de kano, dat was dus één ding minder om me zorgen over te maken. De lange rugnaad daarentegen zou vroeg of laat barsten bij het manipuleren. Het was dus noodzakelijk de nodige verstevigingen te voorzien. Naar verluidt is er hiervoor een set lasergesneden houten steunen op de markt, maar ik verkoos om met wat papieren mallen een aantal tussenschotten in plasticard uit te snijden. De paspennen moesten er ook aan geloven, want de pasvorm was niet zo super. Plasticard strips verstevigden de rest van de rug- en buiknaad. |
Building the kit
The Vigilante is a model that has been on my (and many a fellow modelers') wish list for a very long time.
Trumpeter released the long-awaited kit in the early 2000s. Although the kit is quite well detailled, it comes with sevaral issues that need to be taken care of. First and foremost, the model is a mix of "early" and "late" Vigilantes. The tail cone is not correct for a late version, and this is not easy to correct - so I didn't. Also, the profile of the rudder is wrong, but that was soon remedied using a ruler, a sharp knife and some sanding paper. The nozzles were for an early Vigi, while the model and decals represent more of a late Vigi. That problem was soon solved by making the Aires company a little richer. Ditto for the cockpit, which does not resemble that of a late RA-5C. So I pulled out my wallet and bought a set of Quickboost ejection seats, and an Eduard detail set. The build itself had a few challenges. The fuselage is quite long, and is split down the middle into a left and right half. This makes for a very long and fragile seam along the spine and the belly. The seam at the bottom is hidden under the canoe, so that was one less thing to worry about. The long seam on the spine on the other hand, would sooner or later crack when manipulated. So I thought it necessary to provide some reinforcement. Reportedly there is a set of laser-cut wooden supports on the market for this purpose, but I chose to make some paper templates to cut out some bulkheads in plasticard. The locating pins had to go too, as the fit was not so super. Plasticard strips reinforced the rest of the spine and belly seams. |
 |
|
|
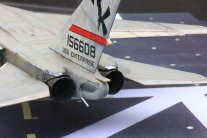
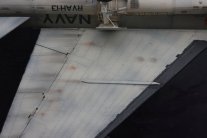
Ik had weinig vertrouwen in de bevestiging van de het richtingsroer. Ik heb er een metalen staafje aan toegevoegd, en in de romp een eindje plastic buis waar het metalen staafje inschuift.
|
I had little confidence in the pin that attaches the rudder to the fuselage. I added a metal rod, and glued a length of plastic tubing in the fuselage into which the metal rod slides.
|
 |
|
|
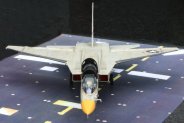
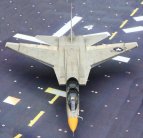
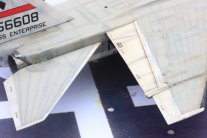
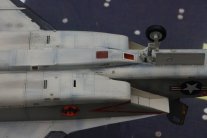
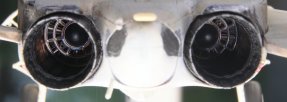
Trumpeter voorziet twee volledige motoren, waar je niets meer van ziet eens het model gebouwd is. In plaats daarvan gebruikte ik de Aires nozzles, die ik langs binnen met plasticcard heb vastgezet.
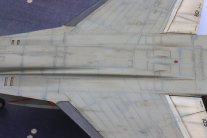
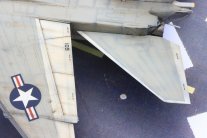
Misschien hadden ze bij Trumpeter beter hun energie in een paar inlaten gestoken. Zoals het nu is, kijk je tot helemaal achteraan in het vliegtuig. Zelf die inlaten bouwen leek me veel werk, en op het randje van mijn kunnen. Daarom koos ik voor de makkelijkste weg, en maakte afdichtingen van plasticard, zoals je bij geparkeerde toestellen ziet. Over de vleugels in de kit is al veel geschreven. Ze zijn bedoeld om gemaakt te worden "met alles naar beneden hangend". Alleen: op de grond en met de motoren uit, "hangt" er bij een Vigilante niets naar beneden. Als je de vleugels correct wil weergeven moet je dus de paspennen weghalen waarmee de flaps en slats aan de vleugel vastzitten. Maar: die slats en flaps van de kit zijn veel dikker dan de vleugel. Dat past dus niet. De oplossing is om de boven- en onderhelften volledig te assembleren: hoofdpaneel, buitenpaneel, 3 slats, 3 flaps/rolroeren. In totaal 8 onderdelen voor de boven- of onderhelft van één vleugel. De volledige set vleugels bestaat dus uit 32 delen! Laat de lijm een dag of twee uitharden, en schuur de boven- en onderhelften van de vleugels tot wanneer de twee helften netjes op mekaar passen. |
Trumpeter provides two complete engines, none of which you will see once the model is built. Instead, I used the Aires nozzles, which I fixated to the inside using plasticcard.
Perhaps Trumpeter should have been putting their energy into a pair of inlets instead. As it is now, one can see all the way to the back of the plane. Constructing those inlets myself would have meant a lot of work, and on the edge of my ability. So I opted for the easy way out, and made intake covers from plasticard, like you find on parked aircraft. Much has been written about the kit's wings. They are meant to be made "with everything hanging down." Only thing: on the ground and with the engines off, nothing "hangs" down from a Vigilante. So, if you want to render the wings correctly, you have to remove the locating pins that attach the flaps and slats to the wing. But: those slats and flaps from the kit are much thicker than the wing. So that isn't going to fit. The solution is to fully assemble the upper and lower halves: main panel, outer panel, 3 slats, 3 flaps/ailerons. A total of 8 parts, both for the upper and lower half of one wing. So the full set of wings consists of 32 parts! Let the glue cure for a day or two, and sand down the upper and lower halves of the wings until the two halves fit together neatly. |
|
De rest van de montage viel best mee. Weinig pasproblemen, voornamelijk rond het vormstuk achteraan. De weinige problemen die er waren zijn opgelost met wat putty en schuurpapier.
Over putty gesproken: de klassieke grijze Tamiya putty mag blijkbaar niet meer verkocht worden in Europa. Ik probeerde de putty 401 van Vallejo uit, maar die rolde op bij het natschuren. Bij de plaatselijke doe-het-zelf zaak vond ik een tube Motip, een soort putty die gebruikt wordt bij carrosseriewerk. Die laat zich heel mooi uitsmeren en perfect glad schuren. En vooral: de putty krimpt niet bij het drogen. Een tube van 200gr. kost één vijfde van een tube van 20ml van Tamiya of Vallejo. Ik heb mijn keuze gemaakt... Hoedanook, er was maar heel weinig nood aan putty: een beetje aan de bakboord vleugelwortel, een beetje bij de rugnaad, en een beetje onderaan waar de romp aansluit op het vormstuk achteraan. Waar de luchtinlaten aansluiten op de romp onderaan was er wel een duidelijke "trap" die ook met putty en schuurpapier is weggewerkt. 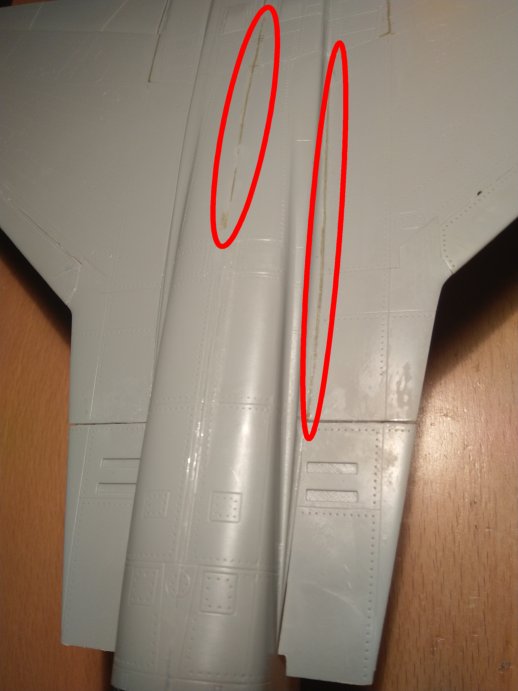
|
The rest of the assembly wasn't too bad. Few fit problems, mainly around the rear empannage. The few problems present were were quickly remedied with some putty and sandpaper. Speaking of putty, apparently the classic gray Tamiya putty cannot be sold in Europe any more. I tried Vallejo's putty 401, but it curled up during wet sanding. At the local do-it-yourself store I found a tube of Motip, a kind of putty used for coach work. It spreads out very nicely and sands perfectly smooth. And above all: the putty does not shrink when drying. A 200gr. tube of Motip costs about one fifth of a 20ml tube from Tamiya or Vallejo. I have made my choice... Nonetheless, there was very little need for putty: a little at the port wing root, a little at the spine, and a little where the bottom fuselage connects to the aft empannage. Where the air intakes connect to the lower fuselage, there was an obvious "step" that was also gotten rid off by means of putty and sandpaper. 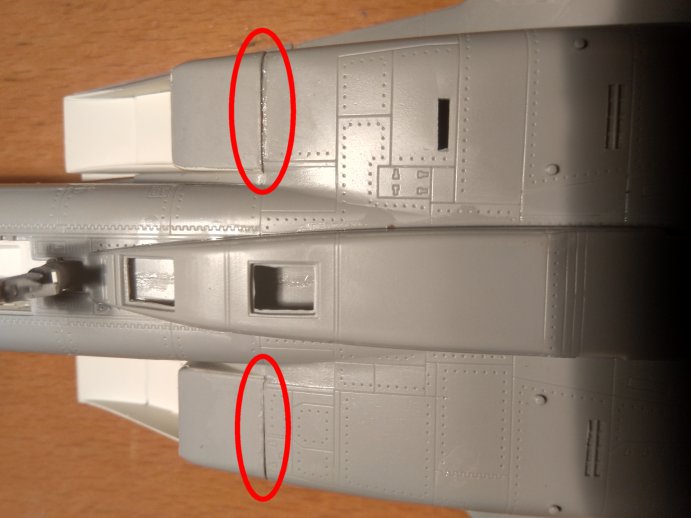
|
|
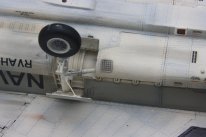
De neuswielpoot moet al in een vroeg stadium geplaatst worden. Ideaal om hem een paar keer eraf te stampen tijdens het bouwen. Dat gebeurde gelukkig maar één keer, helemaal op het einde.
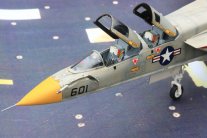
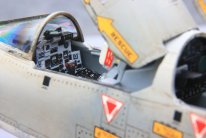
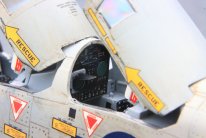
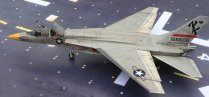
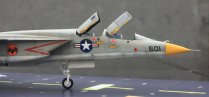
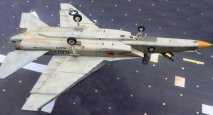
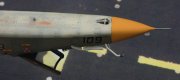
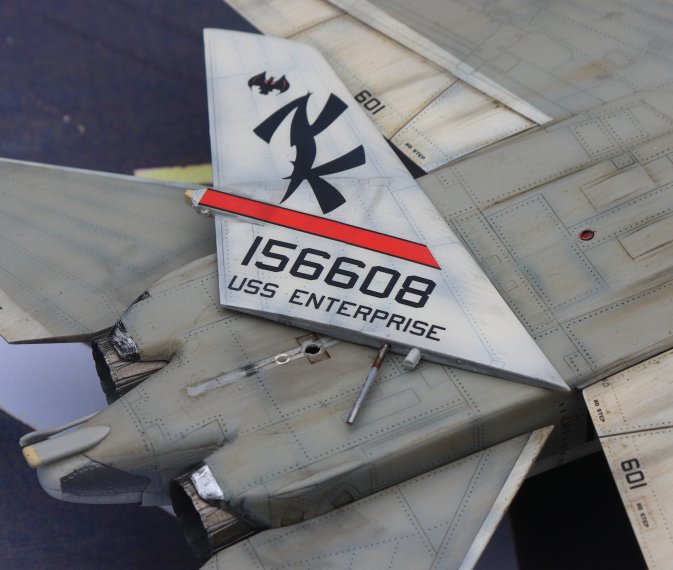
De Eduard detail set bestaat uit photo-etch. De onderdelen voor de cockpit zijn in kleurendruk, de resterende etchings zijn niet bedrukt. De schietstoelen uit de kit vallen best mee, maar ik opteerde voor beter gedetailleerde aftermarket exemplaren. Omdat mijn Quickboost schietstoelen op zich al heel mooi waren, heb ik ze enkel nog aangevuld met de handgrepen waarmee de schietstoel wordt geactiveerd. Deze van Quickboost waren in resine, niet zo erg mooi gegoten en zéér breekbaar. De gekleurde photo-etch van Eduard oogt veel netter. Ook de zijconsoles en de dashboards zijn vervangen door de photo-etch van Eduard. Erg mooi, en goed passend. Van de twee spiegels op de voorste cockpitkap is er op het laatst eentje verloren gegaan, dus heb ik de overblijvende spiegel verplaatst naar het midden van de canopyboog. Niet zo correct, maar ja. Veel van die photo-etch was een uitdaging om te vouwen (zelfs met een Etch-Mate), en sommige elementjes heb ik niet geplaatst wegens te veel gepruts. Als laatste kleefde ik de pitotbuis op de neus en de drie uitsteeksels achteraan de staart: twee antennes/sensors en een brandstof dumppijp. Allemaal smeken ze om er afgestampt te worden... De kit decals zijn van goede kwaliteit, maar geen van beide opties sprak me aan. Zotz heeft echter een decalset die de keuze geeft uit zeven verschillende eenheden. Ik wou een model van een Vigi tijdens de Vietnam oorlog, maar helaas, slechts twee van de opties stelden een toestel uit die periode voor, en één daarvan was ook reeds aanwezig in de kit decals. Zo bleef er maar één optie meer over, tot mijn genoegen een van de meer kleurrijke eenheden, de RVAH-13 Bats. Als de vleermuis in hun eenheidslogo u bekend voorkomt: het is dezelfde vleermuis die je op de Baccardi flessen vindt. Naar verluidt waren ze daar bij Baccardi zo gecharmeerd van dat ze er over waakten dat het squadron nooit zonder rum kwam te zitten. Mijn Vigilante is afgewerkt zoals hij eruitzag tijdens hun voorlaatste WESTPAC cruise, van 12 september 1972 tot 12 juni 1973. RVAH-13 werd opgedoekt op 30 juni 1976, en de laatste Vigilante werd op 20 november 1979 uit dienst genomen. |
The nose gear leg needs to be placed during the early stages of construction. Perfect for knocking it off a few times during construction. Luckily it only managed to knock it off once, at the very end of the build.
The Eduard detail set consists of photo-etch. The parts for the cockpit are color printed, the remaining etchings are unprinted. The ejection seats from the kit are not too bad, but I opted for better-detailed aftermarket ones. Since my Quickboost ejection seats were already quite nice, I only supplemented them with the ejection seat activating handles. The ones from Quickboost were made of resin, not very nicely molded and very fragile. The coloured photo-etch from Eduard looks much neater. The side consoles and dashboards were also replaced with Eduard's photo-etch. Very nice, and a good fit. Of the two mirrors on the front cockpit canopy, one got lost during the closing stages of the project, so I moved the remaining mirror to the center of the canopy bow. Not very correct, but there you are. A great deal of that photo-etch was a challenge to fold (even with an Etch-Mate), and some elements I didn't use, because too fiddly. For the final parts, I glued on the nose pitot tube and the three protrusions on the rear end of the fuselage: two antennas/sensors and a fuel dump pipe. All of them begging to be knocked of... The kit decals are of good quality, but neither of the two options availlable appealed to me. However, Zotz offers a decal set that offers the choice of seven different units. I wanted a model of a Vigi during the Vietnam War, but unfortunately, only two of the options represented an aircraft from that period, and one of those was already present in the kit decals. This left me with only one option, to my delight one of the more colorful units, RVAH-13 Bats. If the bat in their unit logo looks familiar to you: it is the same bat found on Baccardi bottles. Reportedly, the people at Baccardi were so charmed with this that they made sure the squadron never ran out of rum. My Vigilante is depicted the way it looked during RVAH-13's penultimate WESTPAC cruise, from September 12, 1972 to June 12, 1973. RVAH-13 was disestablished on June 30, 1976, and the last Vigilante was retired from service on November 20, 1979. |
|
Gegevens: Lengte: 23.32 m Hoogte: 5.91 m Spanwijdte: 16.16 m Max. startgewicht: 28.615 kg Max. snelheid: 2.128 km/h op 12.000m Actieradius: 1804 km Plafond: 15.600 m |
Data: Length: 23.32 m Height: 5.91 m Span: 16.16 m Max. take-off weight: 28.615 kg Max. speed: 2.128 km/h at 12.000 m Range: 1804 km Ceiling: 15.600 m |
