Plastic Wings
Panavia Tornado IDS - MFG 2 Tarp-Eggebeck september 1987
Panavia Tornado ECR JB 38 “Friesland” - Jever augustus 1990
Klik de miniaturen voor een grotere afbeelding.


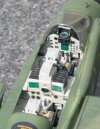


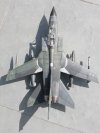


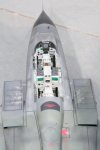


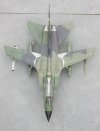


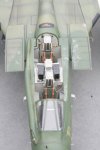
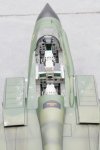



Met voorsprong de traagste build op mijn palmares. Begonnen in aug. 2010, afgewerkt eind april 2012! Nog nooit zo traag gewerkt, vaak maanden inactiviteit.
Voor een Tornado op 1/32 zijn de Revell kits de enige optie, en dat is jammer want er valt heel veel aan te verbeteren. De paneellijnen zijn zeer mooi en vrij correct uitgevoerd – daar waar ze aanwezig zijn... De romp vóór de vleugels bestaat uit een linker- en rechterdeel. De zijkanten zijn perfect gegraveerd, boven en onderzijde zijn haast compleet glad. De achterste romphelft is gesplitst in een boven- en onderhelft. Daar is het net andersom: boven- en onderzijde zijn mooi gegraveerd, de zijkanten zijn compleet kaal gebleven.
Vermits de rompdoorsnede nogal rechthoekig is, zitten we hier wellicht tegen de limieten aan van wat met spuitgieten mogelijk is. Niettemin: alle ontbrekende paneellijnen en klinknagels toevoegen heeft behoorlijk wat opzoekingswerk en tijd gevergd.
Ook qua pasvorm kan het soms een stuk beter: tussen de achterromp en de straalpijpen komt er een soort verloopstuk, en dat sluit helemaal niet netjes op de romp aan. Met veel schaven en schuren en paneellijnen herstellen viel er nog wel iets toonbaars van te maken. Ook het windscherm is een probleem: dat is een twee millimeter te smal om netjes op de canopy aan te sluiten. Helaas een te grote fout om nog te kunnen corrigeren, dus beide zullen met een open kap door het leven moeten.
Voor de hoogteroeren voorzag Revell een verbindingsstuk dwars door de romp. De montage ervan dient reeds heel vroeg tijdens de bouw te gebeuren, zodat het verbindingsstuk vrij snel (tja…) stuk ging bij beide modellen. Ze liggen nu in de romp te rammelen. Om de hoogteroeren toch te kunnen monteren heb ik een plastic buisje dia. 3mm met een boring van 1.5mm doorheen de romp geschoven, en dat aan weerszijden een 2 cm laten uitsteken. Daar komt een stalen staafje van 1.5mm door dat aan beide kanten 1cm uit het buisje steekt. De hoogteroeren zijn uitgeboord en klemmend gemonteerd. Een zeer stevige oplossing.
My slowest build by far. Started in august 2010 and finished by the end of april 2012! Never before have I been so slow, often with months on end of inactivity.
In 1/32nd scale Tornados the Revell kits are the only option and that's a pitty because it has lots of room for improvement. Panel lines are very nice and correct - when they are present... The front fuselage consists of left and right halves. The sides are perfectly engraved while top and bottom are almost completely smooth. The rear fuselage is split into an upper and a lower half. Here it's the other way around: top and bottom sides are nicely engraved but the sides remain completely bare.
As the cross section of the fuselage is quite rectangular, we're perhaps nearing the limits of injection moulding technology. Nevertheless: adding all the missing panel lines and rivets took me rather some research and time.
Also fit could have been a bit better every now and then: between the rear fuselage and the tailpipes there is some sort of adapter ring that really doesn't fit to the fuselage. Lots of filing, scraping and restoring panel lines resulted in a more decent joint. The windshield is also a problem, being 2mm too narrow to mate with the canopy. That's too much off to correct so both models will spend the rest of their lives as convertibles.
For the elevons, Revell provided a conecting piece that runs through the fuselage. This needs to be added early in the construction of the model. I of course managed to break off the connecting pins on both models early on. They are now safely locked up in the fuselage, rattling about merrily when the models are handled. In order to be able to attach the elevons I slid a plastic tube of 3mm in diameter and a bore of 1.5mm through locating holes in the fuselage, letting it protrude about 2cm on either side. In the tube goes a steel rod of 1.5mm diameter that protrudes about 1cm both sides of the tube. The elevons are drilled out to accept the tube and rod so everything fits tightly. A very strong solution indeed.
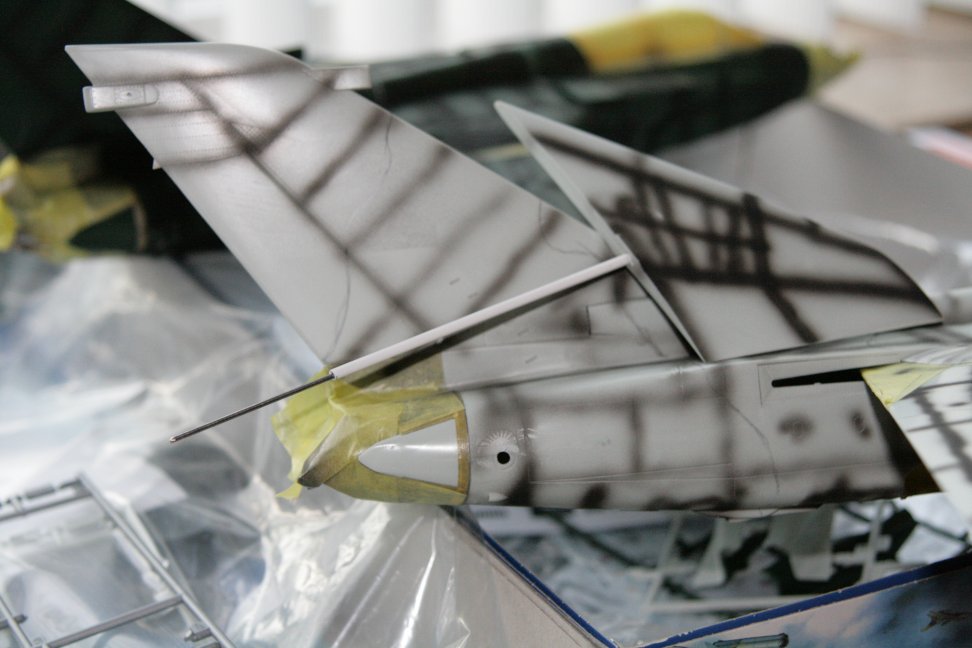
Preshading en montage hoogteroeren met buis & staaf
Preshading and tailplane assembly with tube and rod
De vleugels kunnen desgewenst beweegbaar blijven, Revell zorgde voor een soort hanekam aan beide vleugels die als afgeronde tanden van een tandwiel in elkaar grijpen.
Ik koos ervoor om de vleugels in hun wijdste stand vast te lijmen om twee redenen: enerzijds staan Tornado’s zowat altijd met gespreide vleugels geparkeerd,
anderzijds zouden de pylons onder de vleugels dan ook beweegbaar moeten zijn – maar daarvoor was de bevestiging te breekbaar. Alles voor realisme, al nemen die Tornado’s nu wel erg veel plaats in...
Zoals op de foto nog net te zien is, vertonen de dichtingen tussen zijkant romp en vleugel een veel te ruime opening. De echte dichtingen zijn gemaakt van een zwaar soort textiel uit kunststofvezels, en sluiten zeer nauw aan. Naar het einde van de bouw toe heb ik die dan ook overplakt met metaalfolie die ik recupereerde van een margarinevlootje.
De verende rompplaten die boven en onderaan op de vleugelwortels moeten aansluiten vertonen eveneens een gaping van soms meer dan een millimeter. Ik heb daar vele malen plastruct lijm tussengesmeerd en klemmen opgezet, maar het kwam keer op keer los. Uiteindelijk wou het met wat Tamiya Extra Thin aan mekaar blijven plakken, en zo ziet dat hele vleugelgedoe er ook weer wat realistischer uit.
Zoals gewoonlijk begon het werk in de cockpit. Goede referenties zijn niet in massa beschikbaar, en spreken mekaar soms wel eens tegen. Dat zal vast wel te verklaren zijn door verschillen in productieruns, de zgn. blocks. Kort voor ik de laatste antennes zou bevestigen zag ik op een beurs een pracht van een naslagwerk van Andreas Klein dat zelfs de Daco-boeken in de schaduw stelt. Helaas voor mij te laat om daar nog iets aan te hebben.
In die cockpits was best nog veel detail aanwezig, dus met een fijn penseel, olieverf en een vergrootbril in de aanslag bracht ik vele uren zoek met het schilderen van instrumenten en knopjes allerhande. De schietstoelen zijn voor mij voldoende gedetailleerd, al zal een resine-exemplaar vast nog fraaier zijn.
The wings are made to be moveable: Revell provided some sort of gear at the wing roots.
I opted to glue the wings in the widest position for two reasons. One: Tornados are almost always parked with the wings in the widest position.
Two: if I left the wings moveable, then the pylons would have had to be moveable as well. But their attachment was way too flimsy for this. Anything for a realistic model, though them Tornados now sure take a lot of shelf space...
As one can just make out in the bottom picture, the wingseals in the kit show a much too wide gap. The real ones are made of a strong and thick textile that makes for a tight seal. At the end of the project I created new seals from the tin seal of a margerine cup and glued these over the kit parts so they would give some backing to the tin.
The flexible plates that cover the top and bottom of the wing roots showed a gap of about one mm in the model, whereas in reality they lie flush with the wings. I applied plastruct several times and clamped the assembly with strong clamps but they became unglued time and again. Eventually some Tamiya Extra Thin proved strong enough to "weld" the pieces together, improving the realistic look of the model.
As usual, work started in the cockpit. Good references are hard to come by and tend to contradict each other. I suppose the different building batches or blocks might have something to do with that. A day before I was to add the last antennae I found a reference work by Andreas Klein: a true gem that even puts the Daco books in the shadow. Too late for me, unfortunately, to draw any profit from it.
The kit cockpits have adequate detail, so with a pointed brush, oil paint and magnifying glasses at the ready, I passed many hours painting instruments and buttons of all sorts. For me the ejection seats were sufficiently detailed, though resin ones would haven even been better.
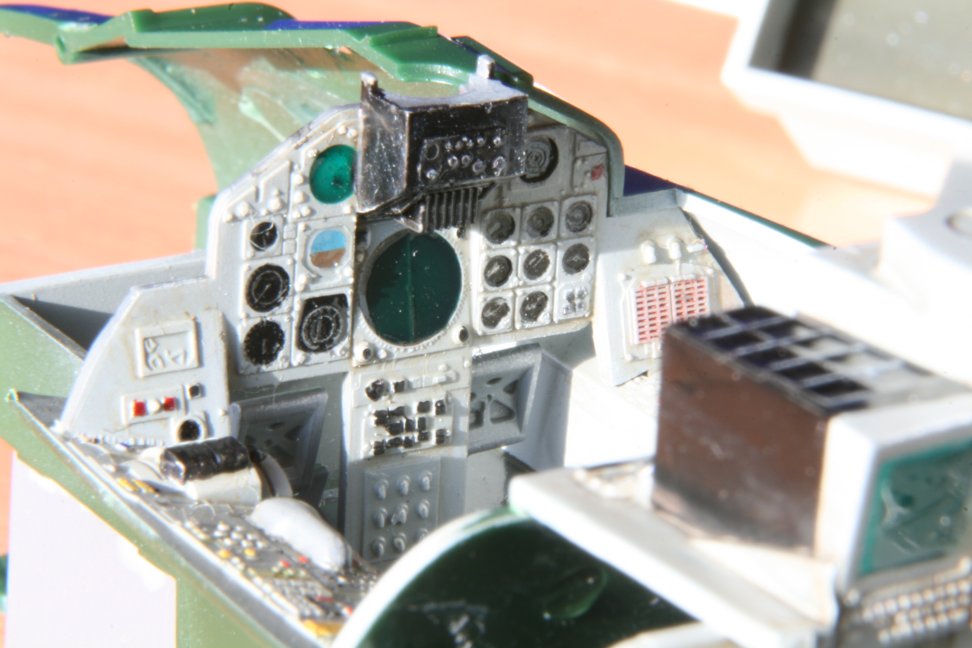
Eenmaal de cockpit voldoende afgewerkt kon deze in de romp worden gepast. Vooraleer de romp kon gesloten worden, moesten eerst de vleugels er nog in worden gemonteerd.
Het deel van de vleugels dat bij het echte vliegtuig in en uit de romp schuift kreeg eerst nog een grijs kleurtje en wat wheatering, dan pas konden ze in de romp worden gemonteerd.
Nog flink wat loodbolletjes in de neuskegel gestopt, en de romp mocht dicht.
Dat ging tegen alle verwachtingen in zeer vlot en zonder noemenswaardig schuur- en plamuurwerk achteraf. Jammer dat die luchtinlaten langs hun binnenkant een rampgebied zijn.
Zo was ik al vlug toe aan het pre-shaden: met verdunde zwarte verf uit de losse pols over de meest prominente naden spuiten. Nu zijn beide kits niet in dezelfde kleur plastic gemaakt: de ECR was lichtgrijs, terwijl de IDS deels uit donkergrijs en deels uit donkergroen plastic was vervaardigd. Vooral die IDS zorgde voor wat twijfels omtrent hoe effectief die preshading zou blijken.
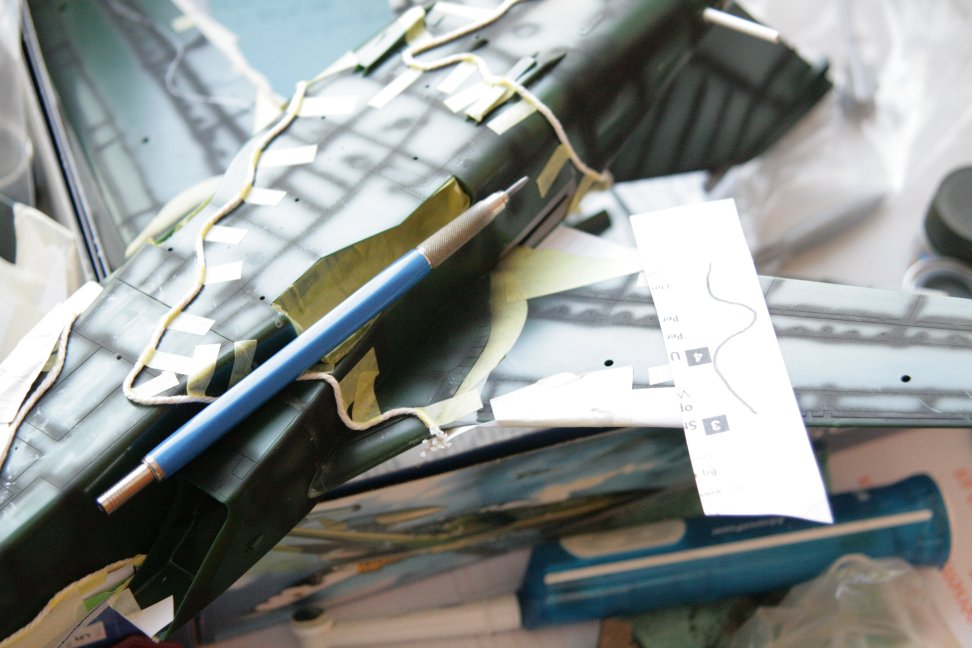
Na het preshaden moest er worden afgeplakt. Sommigen spuiten zo’n patroon met de vrije hand, maar deze jongen is daar niet zo handig in dus spendeerde ik vele avonden aan contouren leggen met keukentouw. Dat keukentouw dient twee doelen: het maakt het mogelijk de vorm van de papieren maskers te bepalen met behulp van een potlood en de doorwrijfmethode, en het houdt de maskers een tweetal millimeter van de romp, zodat de overgang tussen twee kleuren mooi wazig blijft.
Once the cockpit was sufficiently detailed it could be fitted into the fuselage. Before the fuselage could be closed, the wings had to be glued into place.
The part that actually rotates in and out of the fuselage with the real aircraft, was given a lick of grey and some weathering before they were glued into place.
I glued a liberal amount of lead pellets in the nose cone, and closed the fuselage.
Against all expectations this went remarkably well and almost no filing or putty was required. Too bad the insides of those intakes are such a disaster.
Soon I was preshading: very thinned down black paint sprayed freehand over the most prominent panel lines. As luck would have it, both kits are made from a different colour of plastic: the ECR was made from a very light grey while the IDS was made partly from dark grey, partly from dark green plastic. The IDS in particular made me have doubts as to how efficient this preshading would turn out to be.
After the preshading the lot had to be masked. Some might want to airbrush such a pattern freehand, but this fellow isn't very good at that. So I spent many evenings laying out the pattern contours with string. The string serves two purposes: it makes it possible to determine the shape of the paper masks by rubbing a pencil over the paper where there's string underneath, and secondly, ik keeps the paper masks a good two millimeters from the model, making for a nice soft edge between two colours.
Als alle kleurtjes er aan hingen was het tijd voor zes dunne lagen Future alvorens de decals aan te brengen. Beide kits komen met een prachtig en zeer omvangrijk decalvel waarbij de ECR
zelf volledig in tijgerkostuum kan worden gestoken. Nu zie ik m’n vliegtuigen echter veel liever in hun werktenue dan met een feestneus, dus maakte ik iemand gelukkig met een set tijgerstrepen. De "MARINE" en MFG 2 decals maakte ik zelf.
De stencils voor onderhoud en dergelijke meer waren zeer talrijk. Niettemin is Revell er bij de twee kits in geslaagd hier en daar te weinig stencils te voorzien. Op het eindresultaat valt het
eigenlijk niet op, maar tijdens het decallen was dat toch maar weer een bijkomende ergernis!
Ondanks de goede voorbereiding met Future waren er hier en daar toch nog een paar zilverende decals. Geen nood, met een scherp mes wat sneetjes en gaatjes in die decals gemaakt, en dan wat Daco decalsetting er op. Uiteindelijk terug Future over de hele zaak, en weatheren maar. Eerst een wash van terpentijn en olieverf. Naargelang de donkerte van de camouflagekleur gebruikte ik donkergrijs of burnt sienna voor de wash.
De wash een tweetal weken laten drogen, matte vernis er overheen en dan nog wat weatheren met diverse kleurtjes pastelkrijt om slijtage, roest en vloeistofsporen te simuleren. Dat alles echter in bescheiden mate: naar mijn gevoel worden paneellijnen vaak te sterk benadrukt. Bij een echt vliegtuig vallen die heus niet zo sterk op, zelfs niet bij de doorgaans erg smerige Duitse Tornado’s. Preshaden is naar mijn opinie realistischer.
Alles verzegelen met een laatste laagje matte vernis, en om te eindigen hier en daar nog wat zilver gedrybrushed en de kleine prutsen zoals antennes en lampjes toegevoegd.
De bewapening die Revell meelevert is zeer uitgebreid, en mooi weergegeven. Voor de puristen onder ons valt er altijd wel wat te mekkeren, maar als het er goed uit ziet is het voor mij al lang OK. Omdat ik de IDS in de Marineflieger uitvoering wou (niet voorzien in de kit) had ik er graag een tweetal Kormoran raketten onder gehangen. Daar heb ik het internet voor afgespeurd, maar helaas: niet op 1/32 te vinden. Dus werd het een standaarduitrusting van twee droptanks, twee sidewinders, een ECM-gondel en een chaff/flare strooier onder de vleugels. Onder de romp kwamen vier “domme” bommen. Om het een beetje interessanter te maken, is één van de droptanks nog in de oude Norm 76 camouflage, terwijl de rest van het vliegtuig een Norm 87E jasje kreeg.
De ECR kreeg dan weer een Norm 83B beschildering. In beide gevallen is het patroon hetzelfde, maar de kleuren verschillen. Ik vind die Duitse camouflagepatronen wel wat hebben, en ’t is eens iets anders dan dat eeuwige en alomtegenwoordige grijs.
Onder de ECR hangt zowat hetzelfde als onder de IDS, al zijn de bommen door twee HARM-raketten vervangen. ’t Is tenslotte een ECR, nietwaar?
Once all paintwork done it was time to put on six thin layers of Future before aplying the decals. Both kits come with splendid and elaborate decal sheets. The ECR can even be dressed as a tiger.
Well, I much rather like my models in their everyday working clothes than in some fancy dress so I made someone else happy with that set of tiger stripes. I custom made the "MARINE" and MFG 2 patch decals.
Stencils for maintenance and so on were very numerous. Nevertheless, Revell succeeded to shortchange us on stencils in both kits. It doesn't stand out on the end result but I could have done without the extra aggravation!
In spite of all the preparation with Future some of the decals silvered eventually. Not to worry: a sharp knife to make some small cuts and holes in the offending decals, and some Daco decal setting solved the problem. Some more Future to seal the lot in, and on to the weathering. First a wash with oil paint and turpentine. Depending on the shade of the camouflage I used very dark grey or burnt sienna.
I let the wash dry for over two weeks, sprayed a matt varnish over it and continued my weathering with several colours of pastels to simulate the wear and tear, rust and fluid streaks. All of this was very moderately applied. I feel that panel lines are often overemphasized. On the real thing they usually don't stand out that much, not even on the often very dirty German Tornados. In my opninion, preshading is more realistic.
Everything was sealed in with an ultimate layer of matt varnish, and as a finishing touch some silver was drybrushed on and the fiddly bits like antennae and lights were added.
Revell suplies a rich choice of well rendered ordnance. The purist will always find something to rant about, but if it looks convincing it's OK by me. Since I wanted to do the IDS as a Marineflieger (Navy) and that was not the version in the box, I would have liked to hang two Kormoran anti-shipping missiles under it. I searched the internet for it but alas: I couldn't find any in 1/32nd scale. So I settled for a standard loadout of two droptanks, two sidewinders an ECM pod and a chaff/flare dispenser under the wings. From the fuselage hang four "dumb" bombs. to make things a bit more interesting, I painted one of the droptanks in the old Norm 76 camouflage while the rest of the plane received a Norm 87E job.
The ECR on the other hand got a Norm 87B camouflage. Both patterns are the same but the colours differ. I find these German patterns kinda neat, and it makes a change from that eternal and omnipresent grey.
The ECR carries about the same load as the IDS, but the bombs are replaced by two HARM missiles. After al, it is an ECR, right?
Data
Kit: Revell 04700 en 04718 built straight out of the box.Scale: 1/32
Glue: Slater's Mek-Pak, Plastruct Plastic Weld, Tamyia Extra thin and some super thin Zap-A-Gap. White glue for the clear parts.
Putty, polishing compound and masking tape all from Tamiya.
Decals: from the kit Paint: Humbrol enamels and Alclad.
Sealing: Johnson's Future.
Airbrush: Aztec A4709
Wash: artist's oil paints thinned with turpentine.
Weathering: artists chalks and pencils.
Varnish: Revell Matt
Documentation: Aeroguide 4 & 21, RAF Tornado by Paul Jackson, Panavia Tornado IDS by Andy Evans, Panavia Tornado by Andy Evans, Lock On 12 by Willy Peeters, Panavia Tornado In Action, Topshots 10, Panavia Tornado SPearhead of Nato, Tornado Mehrzweck Kampfflugzeug der NATO, Marineflieger Geschwader 2 by Friedrich List, Jagdbombergeschwader 38 by Hartmut Feldman and Wilfried Zetsche, Bildanhang zur Geschwaderchronik Jagdbombergeschwader 38 by Wilfried Zetsche, and the internet.
Built August 2010 - April 2012
Steven De Mulder
